Posts tagged photography tips
3 Tips for Getting Sharper Photos | G. Lin Photography Education

Hey friends! Are you struggling to get clear, sharp photos with your DLSR? This is probably one of the top questions I get from clients or friends, and I TOTALLY remember wondering the same thing when I started out. I was frustrated that I was getting "soft" or blurry photos, and was on a mission to learn how to get crisp images. I've learned it's all about controlling your body and your camera. Here are 3 easy tips that you can use today to start getting sharper photos!

1. Stabilize Your Body and Hand.

Seems like a no-brainer, but this is one of the most common reasons photos turn out blurry! If your hand isn't steady, you're basically adding motion to the camera, which will cause blur. Since most of us take photos hand-held and with no tripod, your camera will be more prone to camera shake. To reduce any camera movement, make sure you are holding your camera properly. Place your left hand underneath your camera body, around the base of your lens barrel, and keep your arms as close to your body as possible.

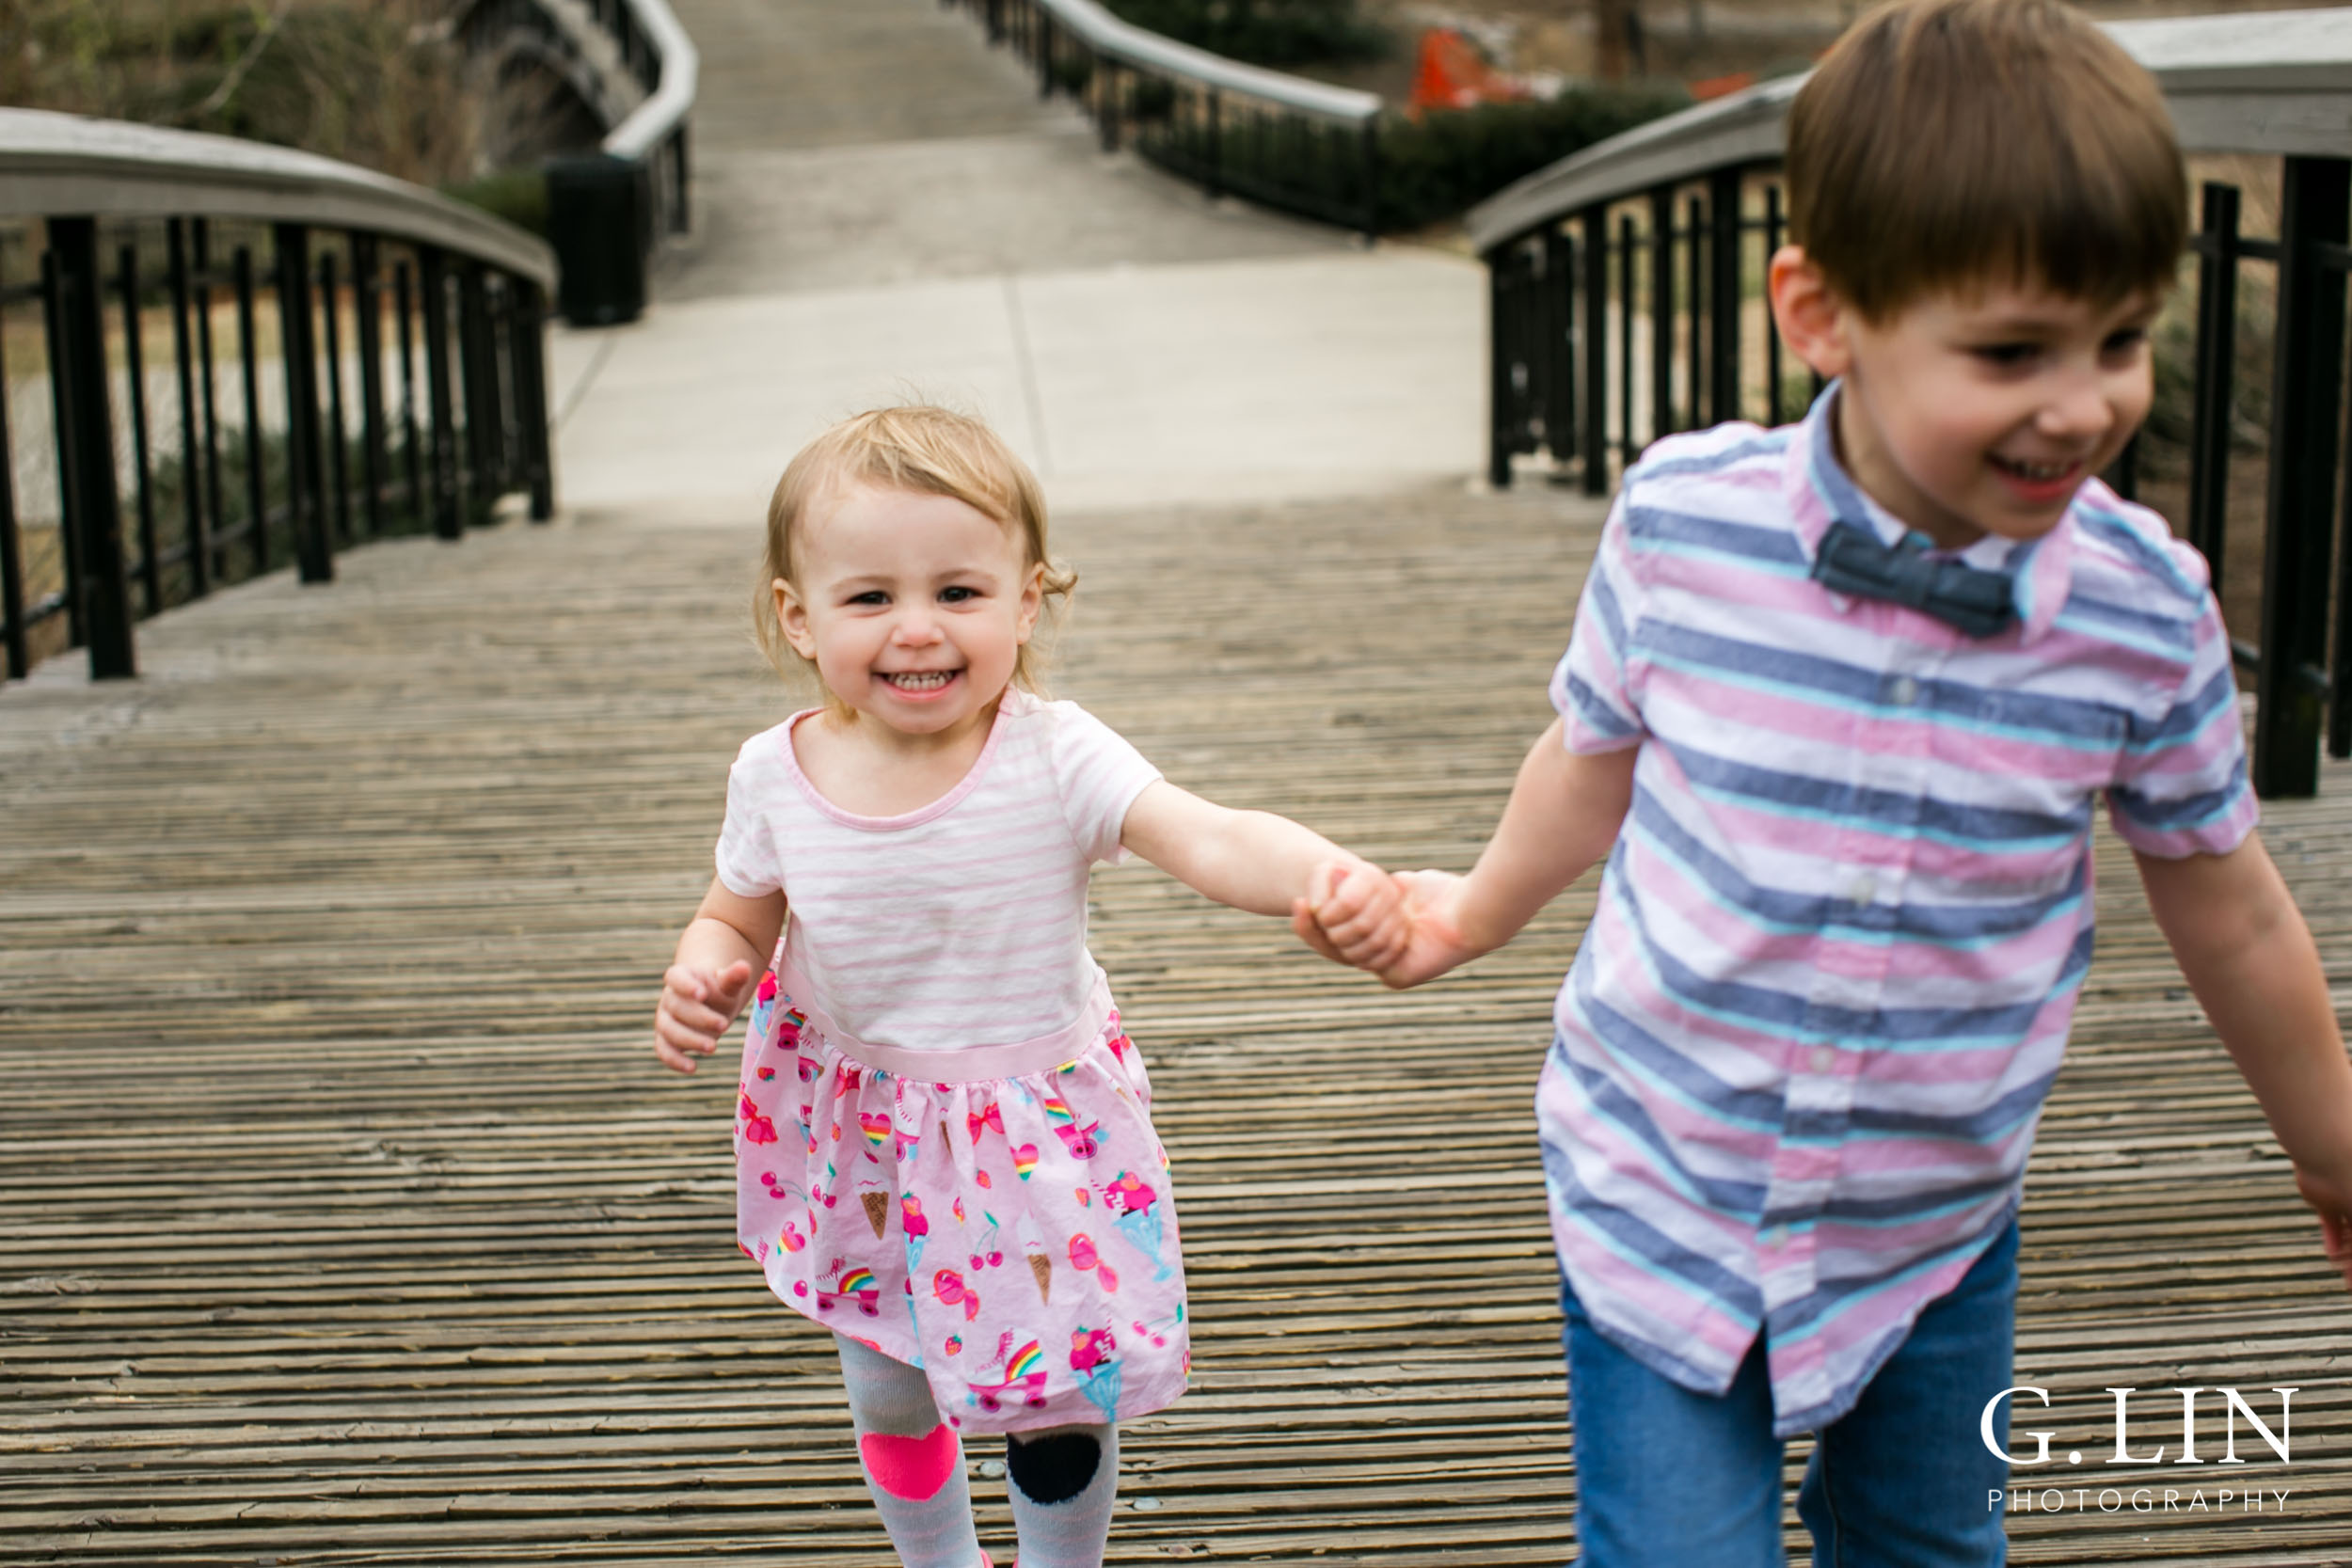
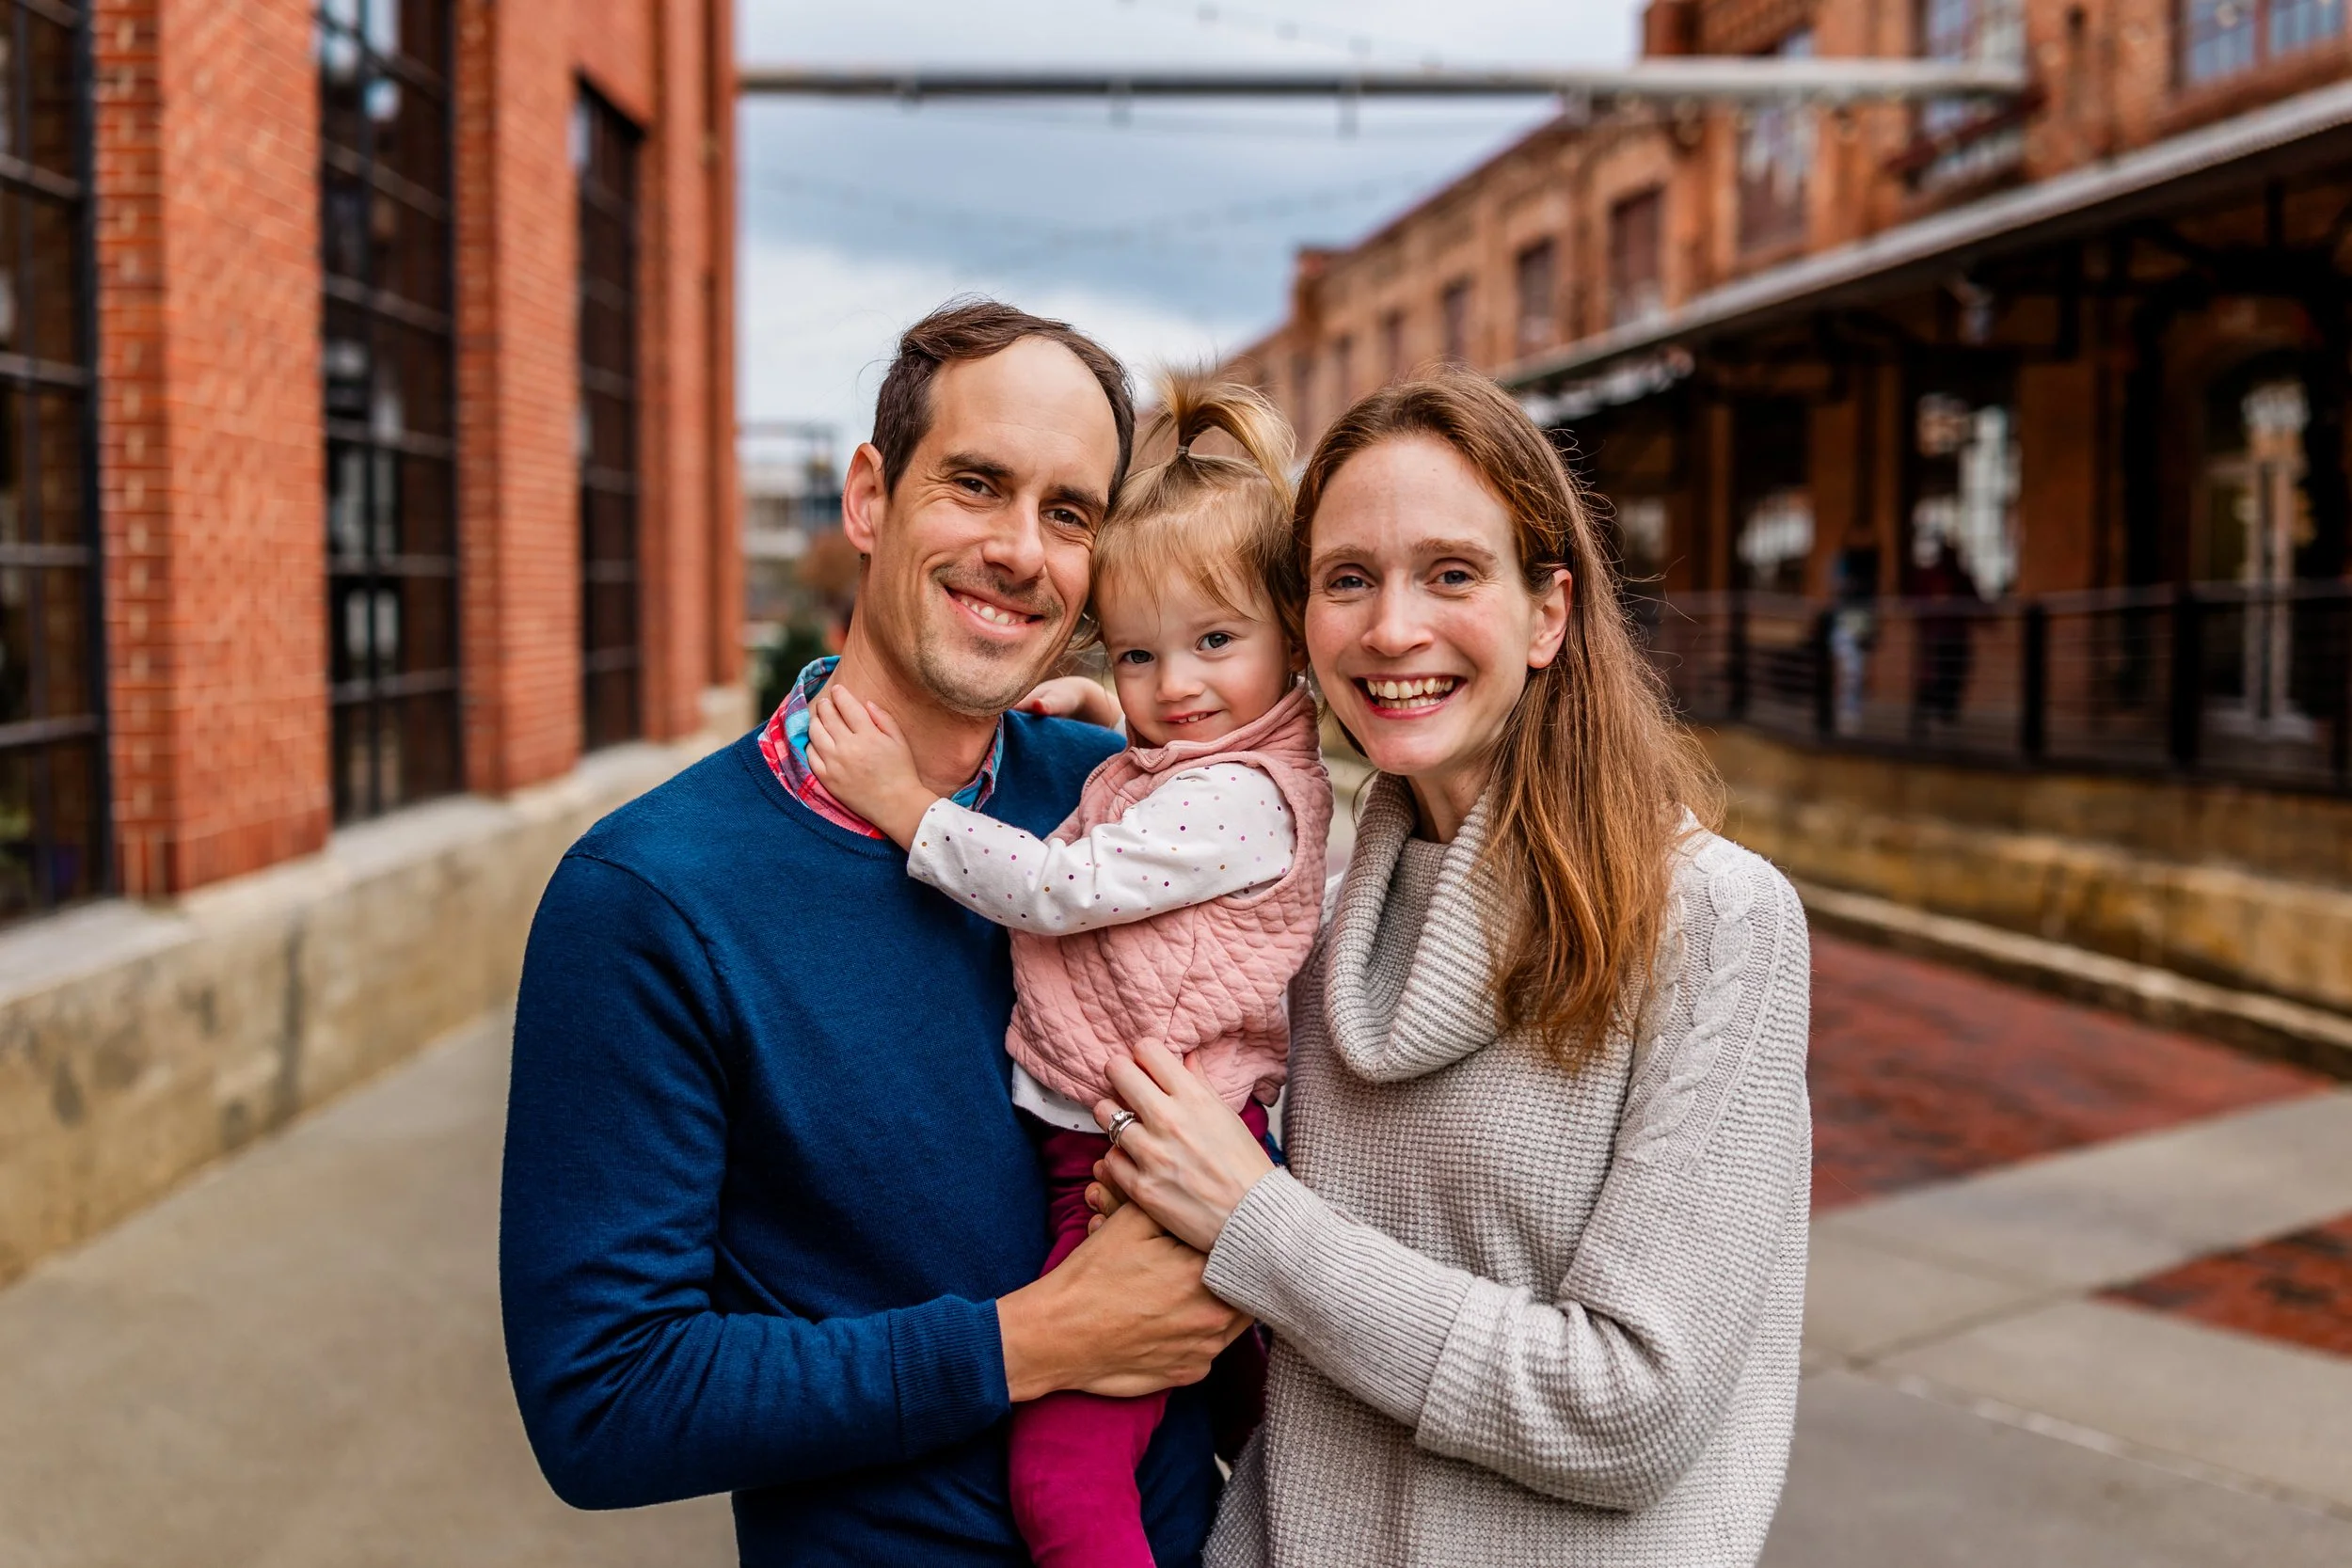
Here's another bonus tip: lean on something stable. This can be as simple as a wall, couch, fence, or tree! Leaning on something that's already stable will help support you and minimize any swaying. As you can see in the photo below, I chose to lean against the couch during a lifestyle family shoot.

Just remember, you are a human tripod. Get creative and constantly look for ways where you can minimize any body or hand movement.

 
Photo of me using the camera | Family Photographer in Raleigh NC | By G. Lin Photography
 

2. Switch to AF Single Point Focus.

Most DSLR cameras have 9, 11 or more autofocus points, and the AF Point Selection is normally defaulted to "Automatic Selection." That means the camera will use all of the AF points and decide which of the autofocus points to use, and you do NOT want this! Your camera can't choose the correct area to focus unless you tell it where you want to focus. The only way to guarantee accuracy, is to switch the AF Point Selection to "Manual Selection" (as seen in the photo below using a Canon 6D). You can then select the single AF point you want and tell the camera where to focus. This will ensure your camera will accurately focus where YOU want it to focus!

 
Close up shot of camera settings | Durham Family Photography | By G. Lin Photography
 

3. Use a Higher Shutter Speed.

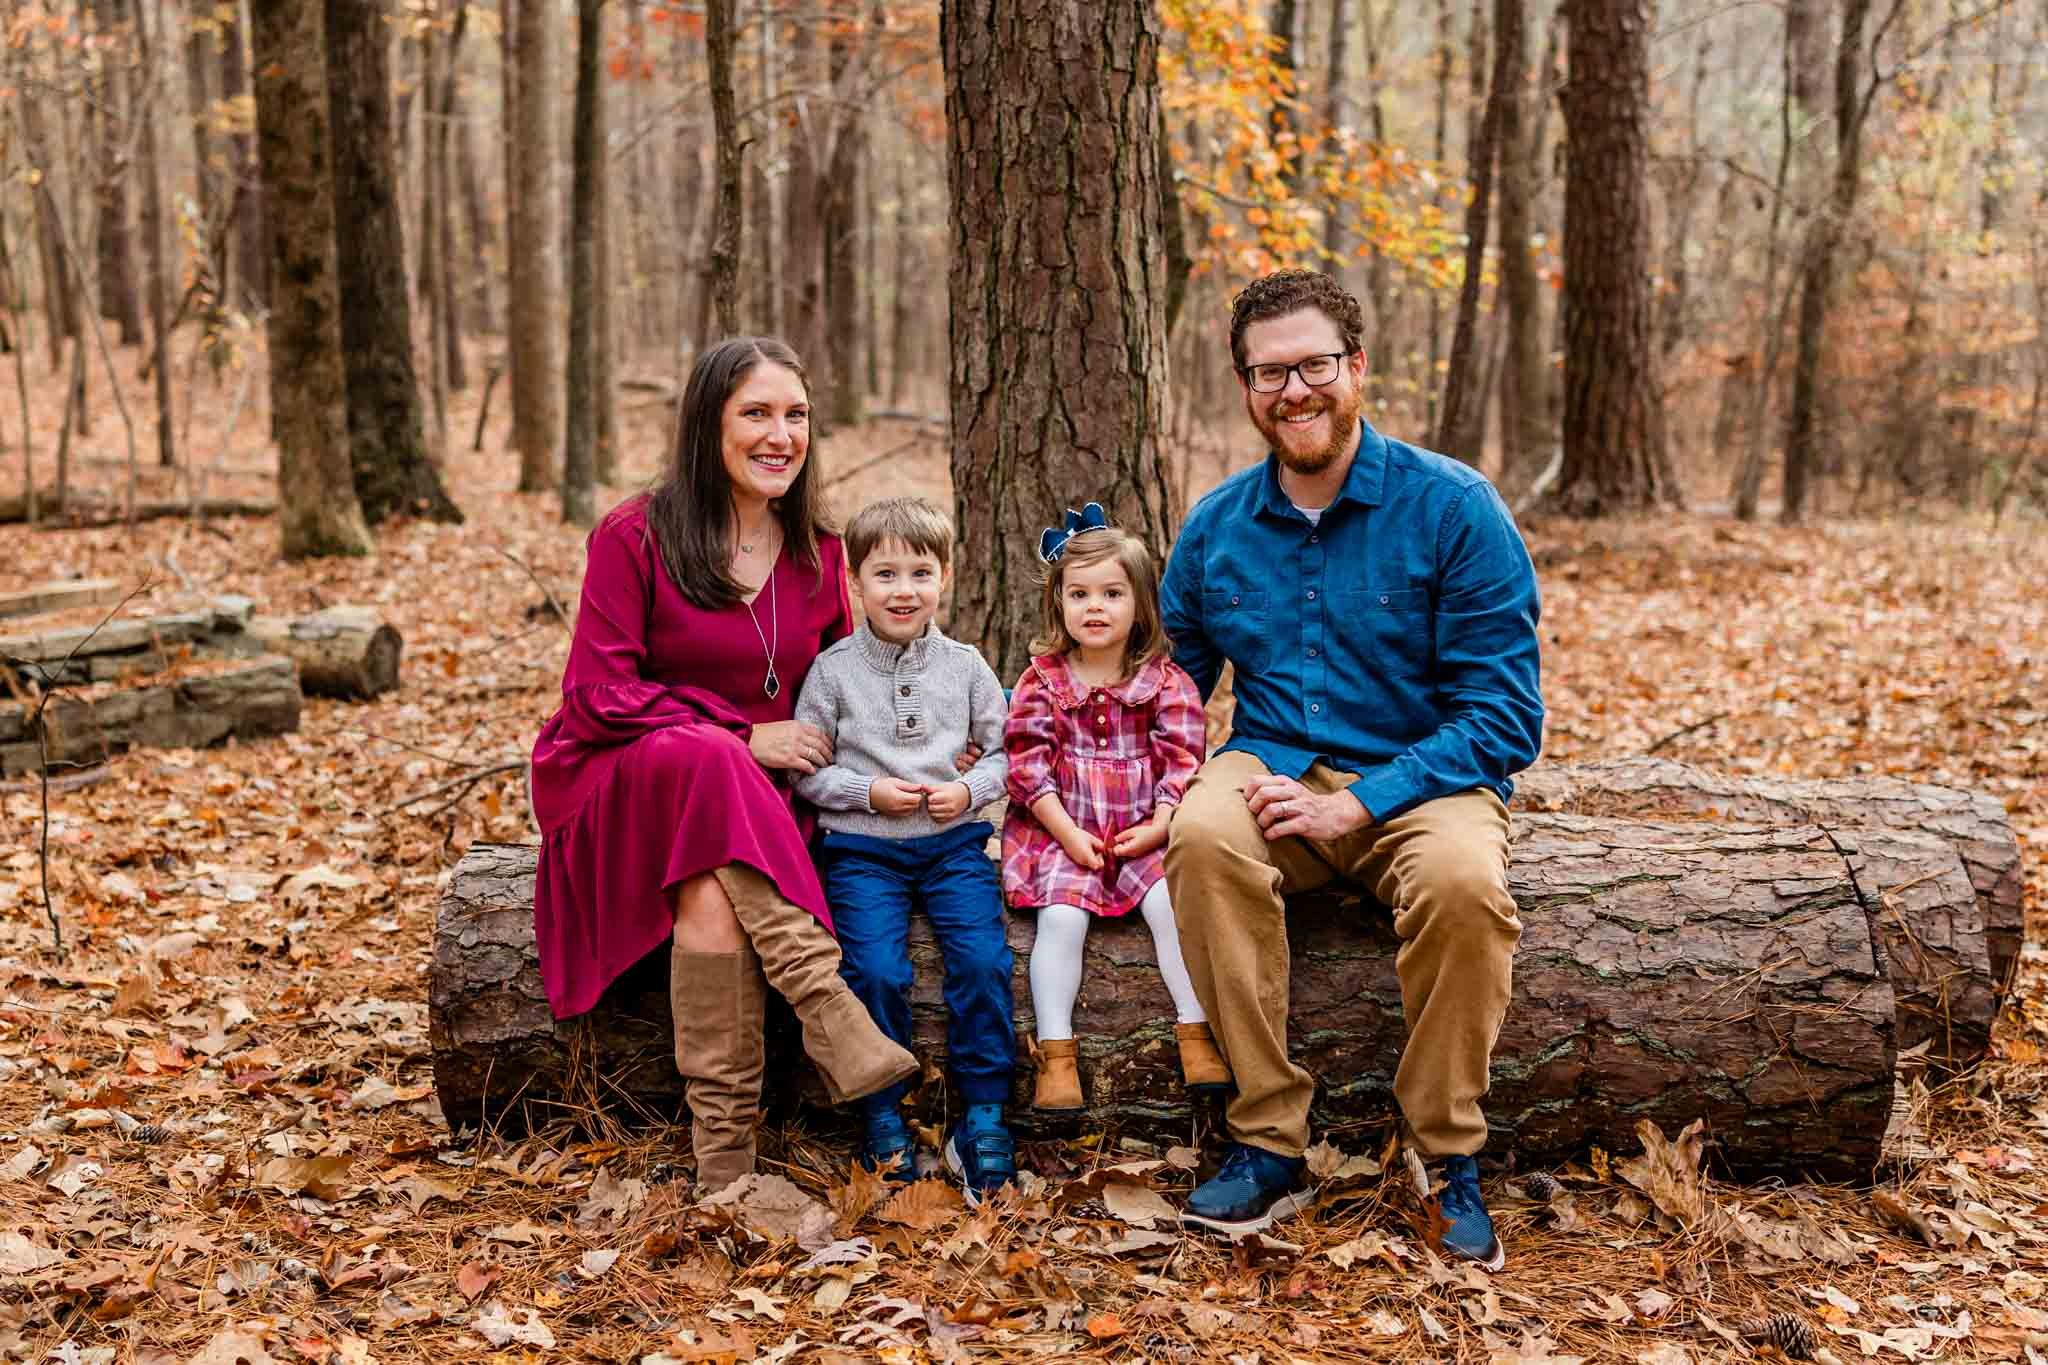
I recommend using a minimum shutter speed of 1/125 for most situations. A higher shutter speed allows me to capture playful moments or quick action shots when I need it most (like the photo below!). I also recommend to really understand the "exposure triangle," which is the relationship between the ISO, aperture, and shutter speed. To learn more, check out my Pinterest board here for beginners and get a free cheat-sheet!

 
Durham Family Photographer | Mom playing with baby boy outside | By G. Lin Photography
 

Join my FREE photography community!

There you have it! These are three easy tips you can incorporate today, but remember, it takes time and practice to develop good technique. There are other advanced techniques I use, but I don't want to overwhelm you ;)

If you've found this helpful or have any questions, I'd love to hear from you! At the core of my being, I truly LOVE helping people (especially for those who want to become a better photographer!). Feel free to shoot me an email at genevieve@glinphotography.com or join my FREE Facebook group! This is a private group for anyone who wants to learn and chat photography. Whether you’re a hobbyist, photo enthusiast, or a newbie, this is safe place where you can ask questions and get feedback.

Have a great weekend and happy shooting!

-Genevieve

5 Simple Tips on Making a Photo Album | Raleigh Family Photographer

Does anyone else struggle with organizing their photos after a trip? Seriously, what do you DO with all your photos? We just finished up the holidays about a month ago and many of you traveled and saw family. Like most people, you probably took photos during the trip and left them on your phone with plans to get to them later...and end up forgetting about them! I totally get it and admit that I recently finished making our honeymoon album and it took me OVER A YEAR to get to it!

That's why I wanted to share some tips that might make photo organization a little easier for you. Here are some time-saving strategies on how you can make a meaningful photo album efficiently and without breaking the bank!

1. Collect all your photos as soon as possible.

After your trip, try to collect all your digital photos in one place as soon as you can. The longer you delay, the less likely you'll get to them! Gather photos from your phone, your spouse's phone, and your DSLR or other camera if you used one, and store them all into one folder. Then make two subfolders, one called, "Backup" and another called, "Favorites" as seen in the photo below. Your Backup folder will be where you keep the original copy of your photos, and the Favorites folder will be the ones you want to print.

So now the question is: how do you narrow down your favorites? Read my next tip!

 
Demo.png
 

2. Choose 20% of your photos to print.

Personally I've found 20% to be a good rule of thumb to follow because it's just the right amount to tell your story without losing any details or being overwhelming. For example, if you went on a short weekend trip and took 100 photos, pick 20 to print. Or if went on a longer vacation and took 500 photos, choose 100 images. Why? Because less is more. You don't need to put every single photo in the album. It can become overwhelming and too long!

3. Buy a traditional photo album at Michaels, Target, or Amazon.

Y'all, if you're making an DIY photo album, I think making a traditional album is faster than making a photo book online (e.g., Shutterfly or Mixbooks). You don't have to spend time designing or editing your layout online, nor do you have to waste time waiting for the program to reload every time you swap out an image or make an edit.

For me, I went to Michaels to buy a classic album with the 4x6 slip pockets because they usually have decent supplies for DIY projects. They also offer coupons frequently, so I used my 50% off coupon and got this album for about $8! Target and Amazon also provide some good album options if you want to explore more designs.

 
This is the cover of the photo album I bought. I thought the travel theme was fitting!

This is the cover of the photo album I bought. I thought the travel theme was fitting!

This is what the album looks like on the inside. It includes 4x6 slip pockets, which I like for easy assembly and clean design.

This is what the album looks like on the inside. It includes 4x6 slip pockets, which I like for easy assembly and clean design.


4. Choose Mpix.com as your photo lab.

I've tested a lot of photo labs from consumer labs to professional labs, and I'd say Mpix is one of the best consumer labs for printing everyday photos. I printed my photos on the E-Surface Paper, which is their most popular photo paper. They describe the paper to have "accurate color, lifelike skin tones, archival quality and a traditional photo finish" and I can confirm that it's TRUE! My prints come out true to color, and the quality is comparable to the professional labs I use for client projects. I also like the traditional photo finish, which has a nice sheen as seen in the photo below.

If you're interested to sign up and try Mpix out, you can click here on my referral link and get a $5 coupon!

 
Printed image
 

5. Display your photo album on the coffee table. 

So what do you do after you get your prints and album, and assemble it all together? I suggest keeping it on the coffee table! Trust me, people LOVE looking at photos! Next time you have a guest, see if they pick up your album...I bet there's a high chance they'll pick it up and tell you how much they love it!

Remember your photos are more than photos. They are memories. They are the moments in your life you don't want to forget. They are the ones that bring a smile to your face. Isn't that worth displaying in your house?

Now go on and print those photos, and keep those memories alive!

Do you have any tips to share? Share them in my NEW Facebook Group! It's a community for people who want to chat about photography and get more tips and education!

3 Tips on Photographing Your Children | Raleigh Family Photographer

Do you love photographing your kids, but you want to make your photos more compelling, organic, and meaningful? Do you want to tell a better story with your photos? Parents often ask me how to take better photos of their kids, and I've put together three EASY tips for you so you can capture beautiful photos of your children! Whether you have a smartphone or DSLR, these principals can be applied to any camera.

1. Use window lighting.

 
G. Lin Photography | Raleigh Family Photographer | Children on white bed hugging each other

Often times parents photograph their children indoors, and the best place to capture photos is next to a window during the daytime. Window light is an easy way to get diffused light, which helps create a soft and flattering look. To create depth and dimension to your photo, have your children turn their bodies about 45 to 90 degrees away from the window, so the light hits them on the side of their face.

2. Photograph at their eye-level.

G. Lin Photography | Raleigh Family Photographer | Two girls sitting on couch smiling at camera

A really easy thing to do is simply get down at their eye-level. Instead of standing and pointing your camera down, I encourage you to get on your knees to take the photo! Most of the time I'm on my knees, crawling around with them because it gives me a better view of their faces and what they're doing. It truly tells a better story!


3. Let them move.

 
G. Lin Photography | Raleigh Family Photographer | Siblings holding hands and running towards camera
 

Instead of telling your child to sit still and say cheese, let them move! Honestly, I've found the best way to capture authentic moments is when kids are having FUN. Be silly with them, and ask them to do things that will naturally get them to giggle. I often ask children to run towards me, or ask them to dance or tickle each other. If you're finding yourself getting grainy or blurry photos, move the fun to a location with more light.

Another tip: if there's an older sibling, I would often ask the older sibling to hug their younger sibling or to lead them by the hand. Why? Because these simple gestures build connection in your visual narrative.

Enjoy putting these new skills into practice!

Want to know my favorite tip? Subscribe to my exclusive client mailing list, GLP Insider, to find out in my next email. You'll also be the first to know about my Fall Sessions, and receive special offers for members only!

If you're looking to book a Durham family photographer or Raleigh family photographer, please contact me here.